The Rebirth of Luna
Luna’s been rebirthing. You’d think she would have learned!
Luna’s about 7 years old. For an oven built as a prototype, that’s getting on. She’s had a robust, quite eventful life so far. She’s lived in four locations, as well as a short stint living ‘on the road’, as the centrepiece to my first travelling bakery and classroom. She was designed to be a mobile, high volume wood fired oven. She was meant to be light, heat up quickly, and be able to bake 300 or more perfect loaves of bread in the space of a market - which would be around eight hours.
For this task, she was a complete failure. The entire mobile bakery enterprise had a number of flaws, as it turned out. I may well have covered these, and the mobile bakery, in a previous blog post; I can’t remember. Anyway, that’s not what this post is about.

That’s Luna’s bush hideaway. She’s in the box…
Luna found her place as a stationary oven. She lived on a fixed site, still on the mobile bakery trailer, at a bush hideaway in Ellalong, where she performed the weekly baking duties for local Saturday markets with incredible finesse. I knew the difference Luna made - a kind of crust that only a brick oven can give you.
She was always a bit tricky to work with - she liked to be pre heated for a good 5 hours before she would really begin to sing, for example. She had some hot spots (which became completely ‘worked around’, as one does with any old bakery oven), and she needed a major clean out and overhaul every year, or she would block up (and actually melt) in parts. I had to rebuild the firebox a couple of times, and used a crowbar to open up a pathway for flue gases when it fatigued after about 5 years use.
I learned the hard way with Luna, every time, but after each rebuild she returned to work, better than ever. She was, for many years, a ‘work in progress’. She eventually became an excellent oven, capable of baking an average of 30 average sized full sourdogh loaves an hour - provided I was on my game - and more if someone was helping me. She did her job as a test bed and we improved our Aromatic Embers ovens as a result.
When the first Bush Bakery at Ellalong came to an end, I packed Luna up in the trailer, took out her bricks, and parked her in a nearby paddock, where she lived for a few months. I towed her here to the farm, and she was parked again for a few more months. We removed her from the trailer after the Tour Down South, and a boilermaker began the task of refurbishing her, with design modifications we had now applied to some of our other ovens.
Luna was my third prototype. I was the test pilot and outside design consultant. Actually, I became the crash test dummy more often than not. The first two prototypes, both named Bertha, turned out to be absolute pigs of ovens, but pigs which were made to sing for their supper nonetheless, thanks to my need to bake decent bread.

Bertha 1 in Cafe mode. Note bricked plate warmer on top!
Luna was different. We really thought about Luna - all our mistakes taught us what NOT to do. So Luna was a decent oven from the getgo - but she developed some long term issues. That’s why I was always working on her - she took a fair bit of tweaking to make her really sing, I can tell you! So when I left her in the boilermaker’s capable hands, I gave him my wish list - or at least half of it. I knew I’d be doing the other half myself.
This time I wanted to make the flame generated from the fire really stretch, so that it could do the job of heating more cleanly, quickly and efficiently. We needed to get the bottom decks more even too. Back in the day, the area above the firebox was always the hottest part of the deck. It was so hot that I had to set loaves to one side so they didn’t burn.

The boilermaker takes Luna apart with the tynes of a tractor.

Stretching the flame in Luna’s firebox.
The top decks have always relatively slow, so we set out to improve the heat here at same time.
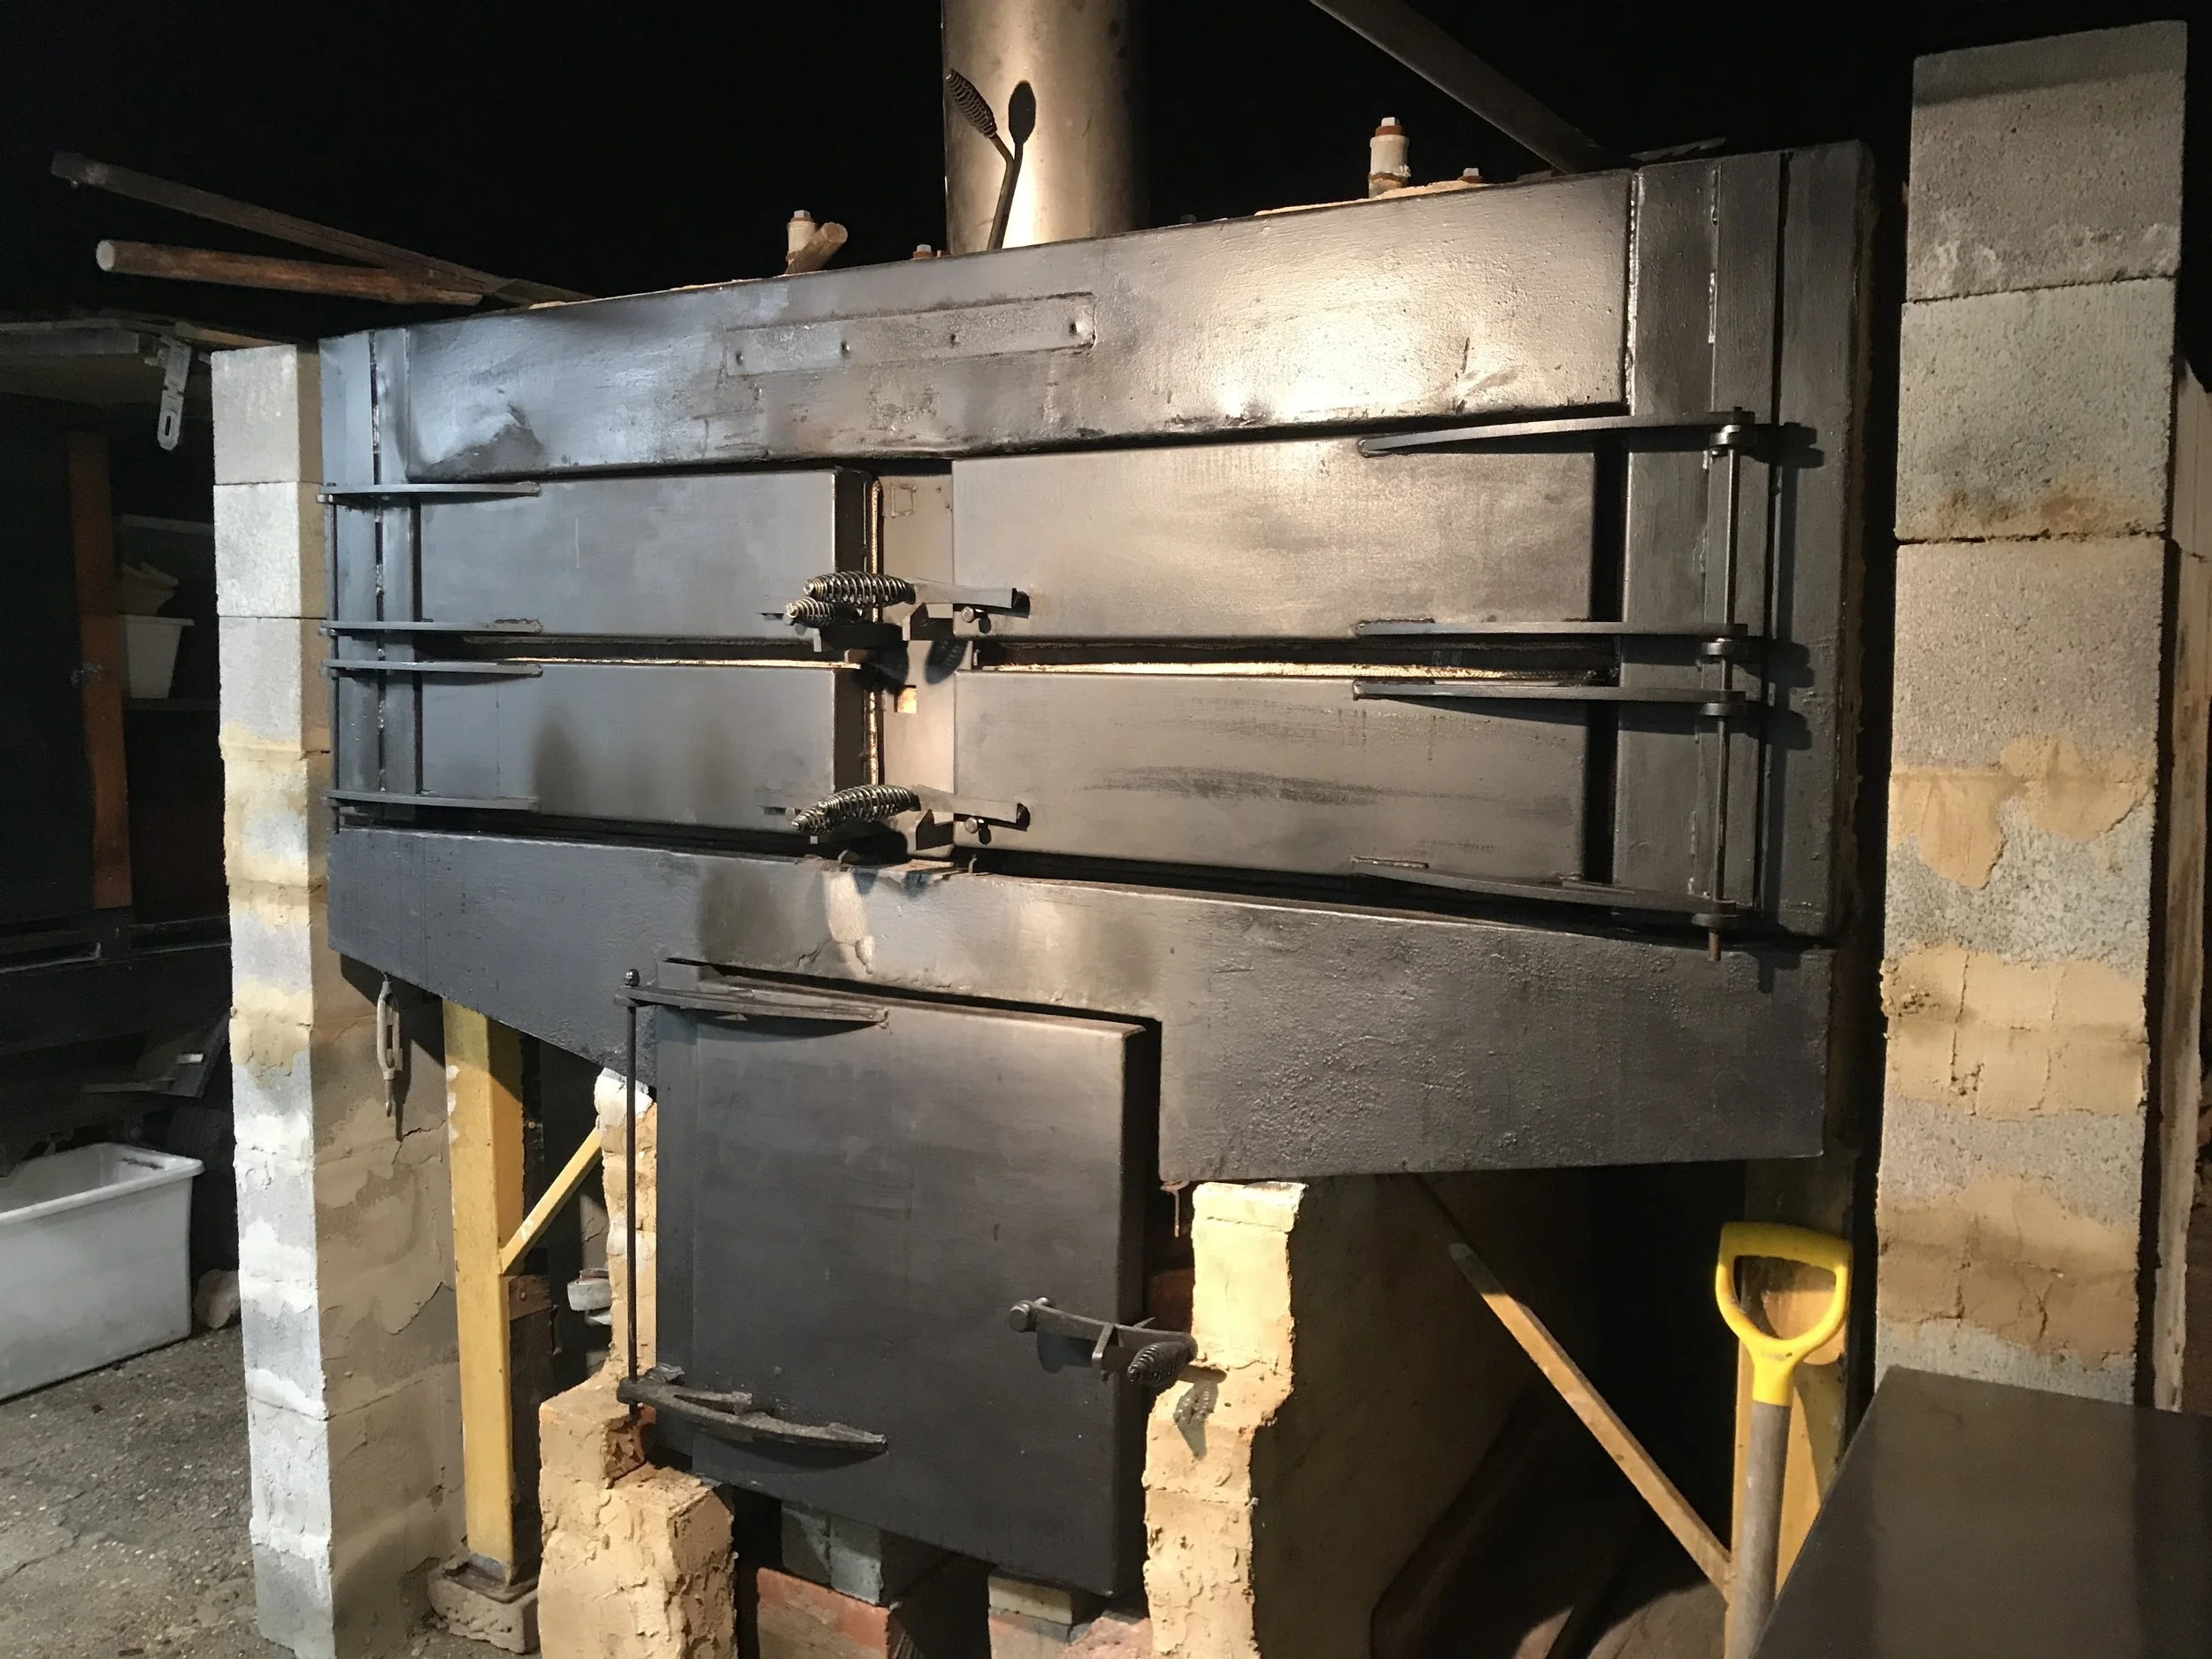
The boilermaker built a more sophisticated and heavy duty baffle system, based on my ideas. He made the baffle itself more angled so that flame was siphoned off better when it runs against it from the firebox. I later bricked the inside of the firebox to further enhance the ‘flamethrower effect’. He rebuilt the firebox to include more brick than before. He also incorporated a whole series of cleaning access tubes to the roof of the oven, so that the area nearest the flue could be cleaned - an issue which had reared its ugly head a couple of times in Luna’s life already.
I’m hoping the changes to the flue system will eliminate the problem of soot build up altogether. I’m fully aware that I may simply be experiencing a case of wishful thinking here. Every designer wants their latest and greatest innovation to work - we always wear rose coloured glasses, to a certain extent. Sometimes, though, it pays to take out insurance. If there was still a build up of soot, despite our new modifications, at least I can now clean it out more easily than in the past.

Luna’s cleaning tubes before they get bricked and mortared.
All this work took many months. Luna was positioned in the middle of a paddock full of farm equipment. When the boilermaker was on the farm, he’d carry Luna’s bits over to the shed on the tines of the old tractor. He’d weld and angle grind and rivet for hours on end. From time to time I’d ‘lackey’ for him - just as I did when Luna was fabricated here on the farm years ago. Only then, as I remember it, I was on crutches. That’s a whole other story. Not this time - I walk pretty well these days.

More heavy duty thermal mass is added before putting Luna back together.
As the work on Luna slowly got done, a bit here and a bit there, the dairy shed also got finished - in much the same manner. A few weeks ago we carried Luna’s 2 finished pieces over to the dairy shed on the tractor, and we put her back together for the first time in a year. Then we positioned her outside the new school classroom and bakery, where she will live for quite a while, I hope.

Luna 2 showing inner layer of brickwork. This will be wrapped with besser brick.
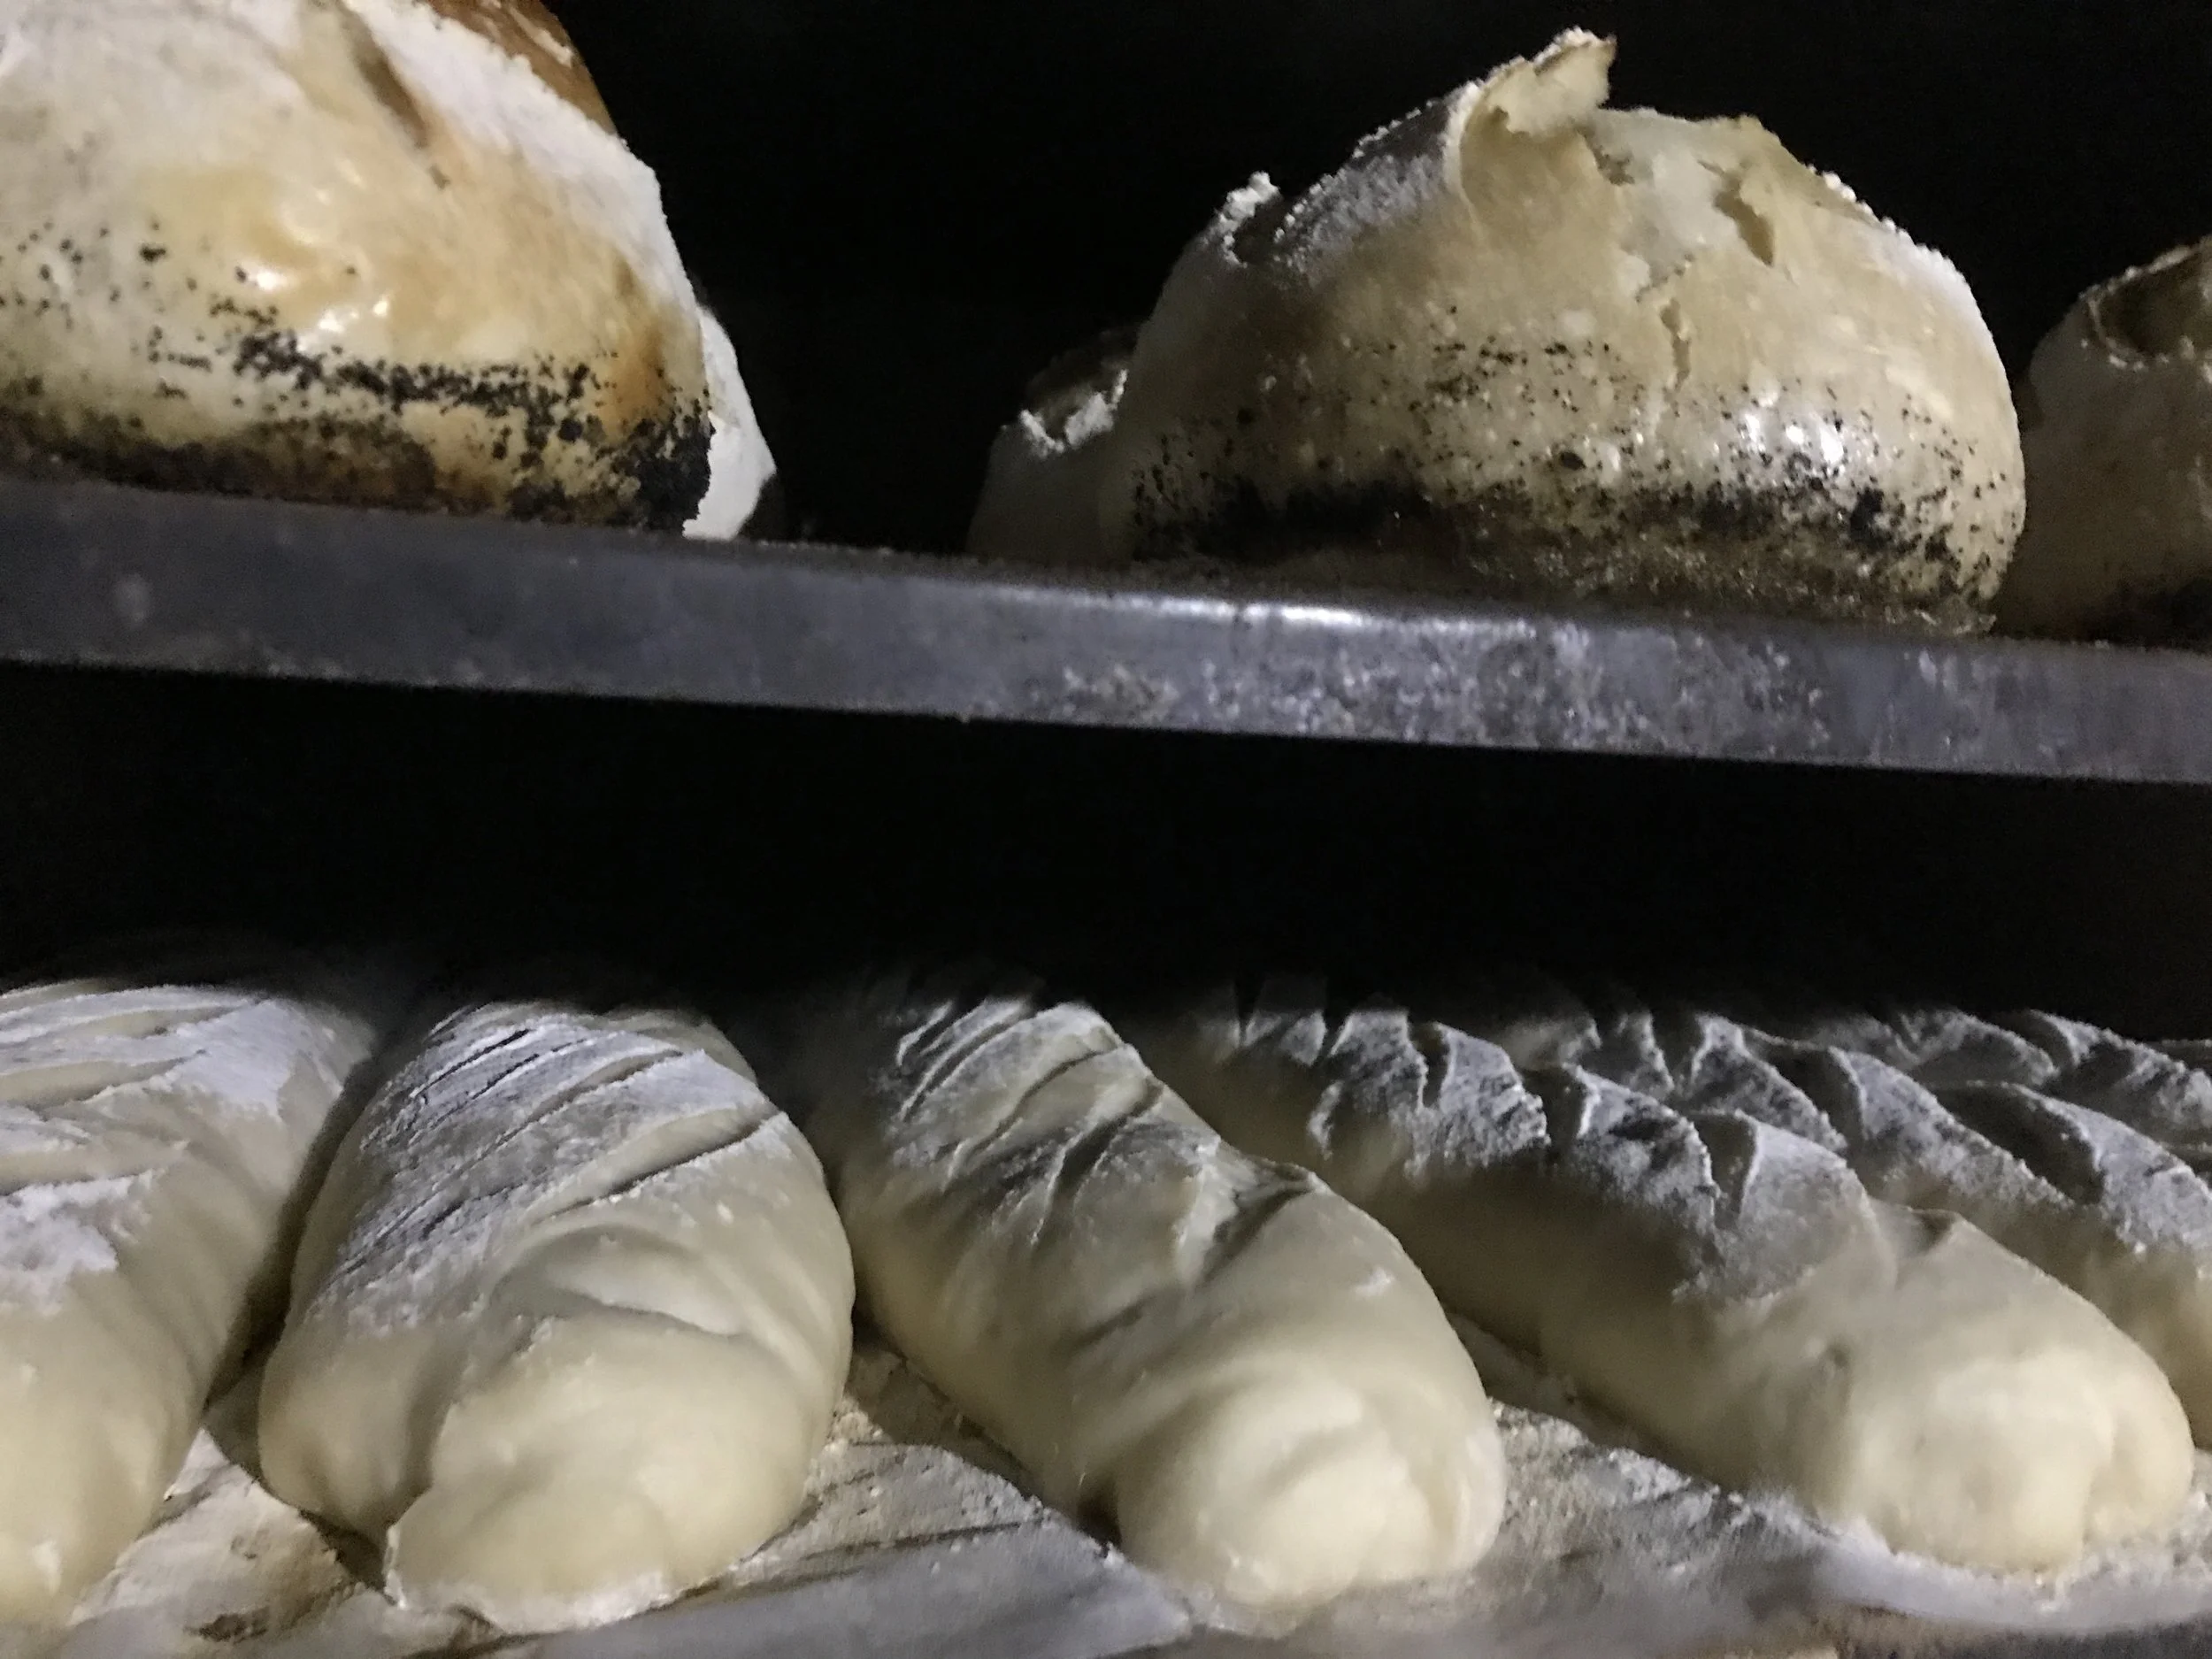
I’ve been bricking her up, inside and out, for the past two weeks or so. It’s slow, heavy work, as a great deal of the brick is in really hard to get at places - inside baking chambers, for example. These baking chambers are only 16 cm high and a metre deep. One slides the bricks in on the end of a metal peel, and manipulates them as best as one can from a metre away. Around the baking chambers there are two layers of brick, and another layer on the top of them. Getting the bricks in place involves climbing up a ladder with brick or bricks in hand, keeping a fresh mortar on the go all the while, for maybe a couple of hundred climbs. Each brick weighs between 2 and 5 kg, and so far I’ve put roughly 500 bricks in and through and around the oven, as well as another couple of hundred inside the baffles, which we did before she was put back together. I’ve only done enough, at the time of writing this, to fire the oven up and make it work.

First layer of brickwork done. The oven is functional here, though nowhere near thermally efficient.
All this extra thermal mass and insulation will become necessary when Luna goes into production mode for the ‘Steady State Bakery’. It will operate as a heat sink, as well as a kind of heat mirror; the thick walls of brick should hold heat for days. Luna will become a super efficient oven.
i was inspired in my design for Luna by spending time at Harcourt Historic Bakery with Jodi and Dave when I did the Tour Down South last year. Their oven is capable of holding high temperatures for days after firing, as it has some 72 tonnes of brick around it. It’s an incredible piece of kit for a 100 year old oven. Dave manages to keep it hot with very little timber each day.
My version only will have maybe four or five tonnes of brick when it’s finished. The principle is similar to the oven in Harcourt though - get the brick hot, and then once it’s hot, keep it there for as long as possible. I’ll be looking for new bakery customers very soon, that’s for sure!

Next layer done. Still have to complete the outer wrapping, add more mass to the roof, and fill the besser bricks with rubble and sand.
Upon firing her up after putting her in place here, I saw that Luna was really a serious piece of flame art now. The firebox works a treat, blasting flame a good few feet each side, in sheets, spread out right under the two baking decks. It takes the oven from cold to baking temperature in just 3 hours, but will do it substantially quicker when it is fired each day or two, as it will retain a lot of heat.

Just a teensie fire here. When I fully blaze the fire, it’s too hot for my camera!
At the time of writing I’m about two thirds of the way through the brickwork. There is an ‘inner outer’ layer of brick around the baking chamber, and another around the firebox. There are two layers on top, with two more layers of grog based on mortar and recycled crushed concrete. There will be another layer of brick and mortar on top as well. There is a layer of besser brick surrounding the three sides, and I’m currently filling these with rubble, glass and sand to add thermal mass, as well as to use up everything I can from a demolished brick wall I was given. I’m going to fill a void between the inner and outer layers with insulation board.
My experience so far has been a bit different to what the world of oven builders has been telling me. One commonly held belief is that insulation like ceramic blanket or rockwool or ceramic board will ‘reflect’ heat back into the structure. While this is possible, there needs to be an outer layer of brick or thick mortar wrapping up the blanket in addition to the blanket itself for any reflection effect to occur. The blanket will eventually dissipate its stored heat in both directions - back in and out. If you wrap your blanket in brick on both sides, the blanket still fills with heat, but it slowly dissipates the stored heat back into thermal mass surrounding it. If you don’t wrap your insular material in thermal mass, you will ultimately allow 50% of the stored heat run out into the atmosphere. In addition, your insular material will actually be absorbing heat from the bricks next to it, contributing to a slower heat up of the oven itself. I learned this with Bertha 2, which took over 18 hours to heat from cold, and really only started to get useful after the second bake for the week. Needless to say, once I figured out our insulation mistake, I got to pull her apart and replace the insulation with brick, and this sped her heating time up by many hours.
The advantage of brick is that while it absorbs heat, it also reflects heat. If you sit beside a brick wall in the sun, you will experience how brick reflects heat. When it becomes ‘soaked’ with heat, it then becomes a heat source - it actually ‘radiates’. So you get reflection, absorption and dissipation (radiation) of heat, in that order. Brick, as a material to work with storing heat, becomes more efficient over time.

One uses ones loaf to make a decent loaf. Or so they say…
So far I’ve used the oven for my standard bakes, and have kept the oven warm over multiple days doing various tasks - slow roasting on one day and baking pizza on another. Luna can hold baking temperature without fire for a couple of hours at the moment. In fact, the top decks increase in temperature for the first six hours of firing, and continue to increase without fire for the next three hours. On some nights I have finished the bake and checked the baking chambers about 10 hours later, and they still held over 120 C. I think I can improve on this by a significant amount by just beefing up the thermal mass and adding strategic insulation in some places.
I’ve done the big stuff, now I will do the little things. Watch this space.
If you would like to experience Luna first hand, I run workshops for the general public each month. Professional baking workshops are held four times a year. Check out what’s on offer.
Post script:
Just a little update regarding Luna’s thermal performance. Since writing this article, I’ve filled in all the besser bricks with rubble, bits of brick and crusher dust. I’ve also enclosed a sleeve of air surrounding the baking chambers with brick. I’ve bagged the outer shell with mortar, and I’m half way through adding a layer of bottles covered in mortar over the top. Once this is done, I’ll paint the top section in black bituminous paint. At this point, the oven holds an average 100 degrees C some 12 hours after a full bake of about 80 or so loaves. It takes just a bit less than 3 hours to reach baking temperature from cold, though if I really want the oven to be fully ‘soaked’, I’ll pre heat for about 5 hours. I’m yet to gather data on how long the oven takes to heat from 100 degrees, but I think it should re heat in just a couple of hours. All the little bits I’ve done to make it hold heat longer are making a difference; and I can see I’ll be doing more as the need to use the oven more often grows with demand for bread. I’m also noticing that to heat the oven takes less fuel now. This is a bit unscientific, because I’m using different wood from around the farm, but the effect is still noticeable. I still don’t have enough demand to fill 2 days baking, but this will gradually build as I get out and gather more subscribers.
Reinventing the Reinvented
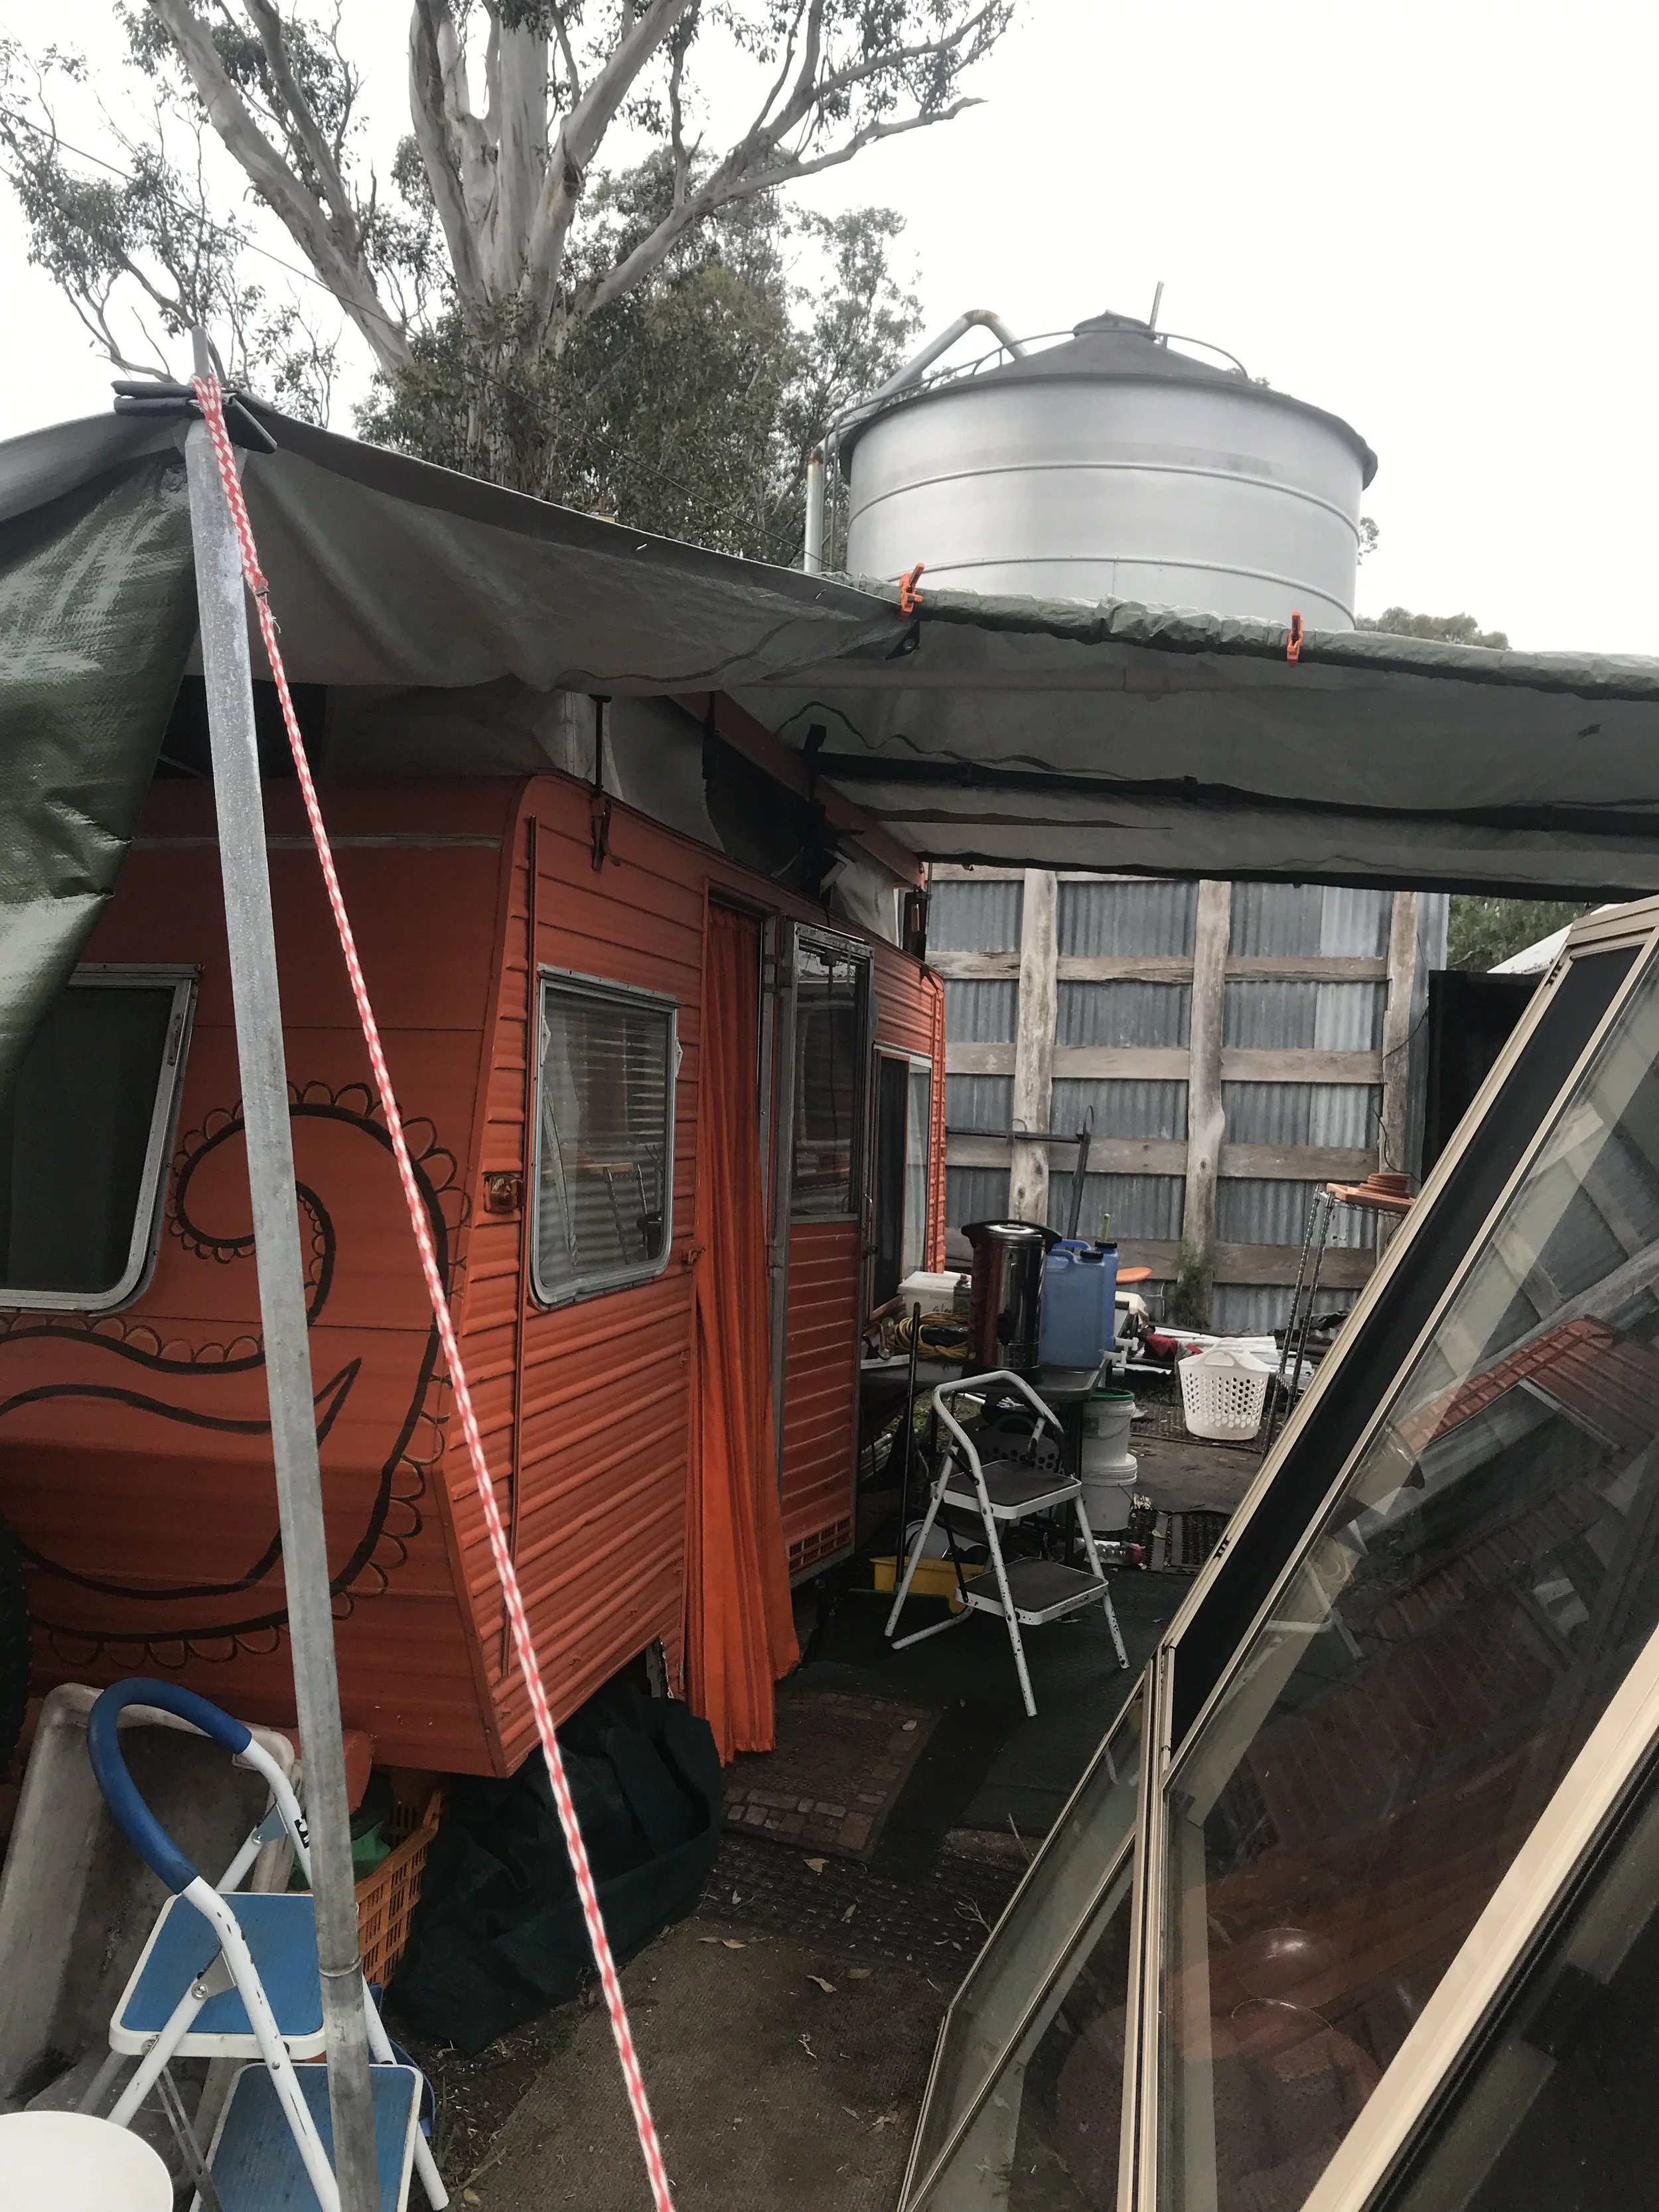
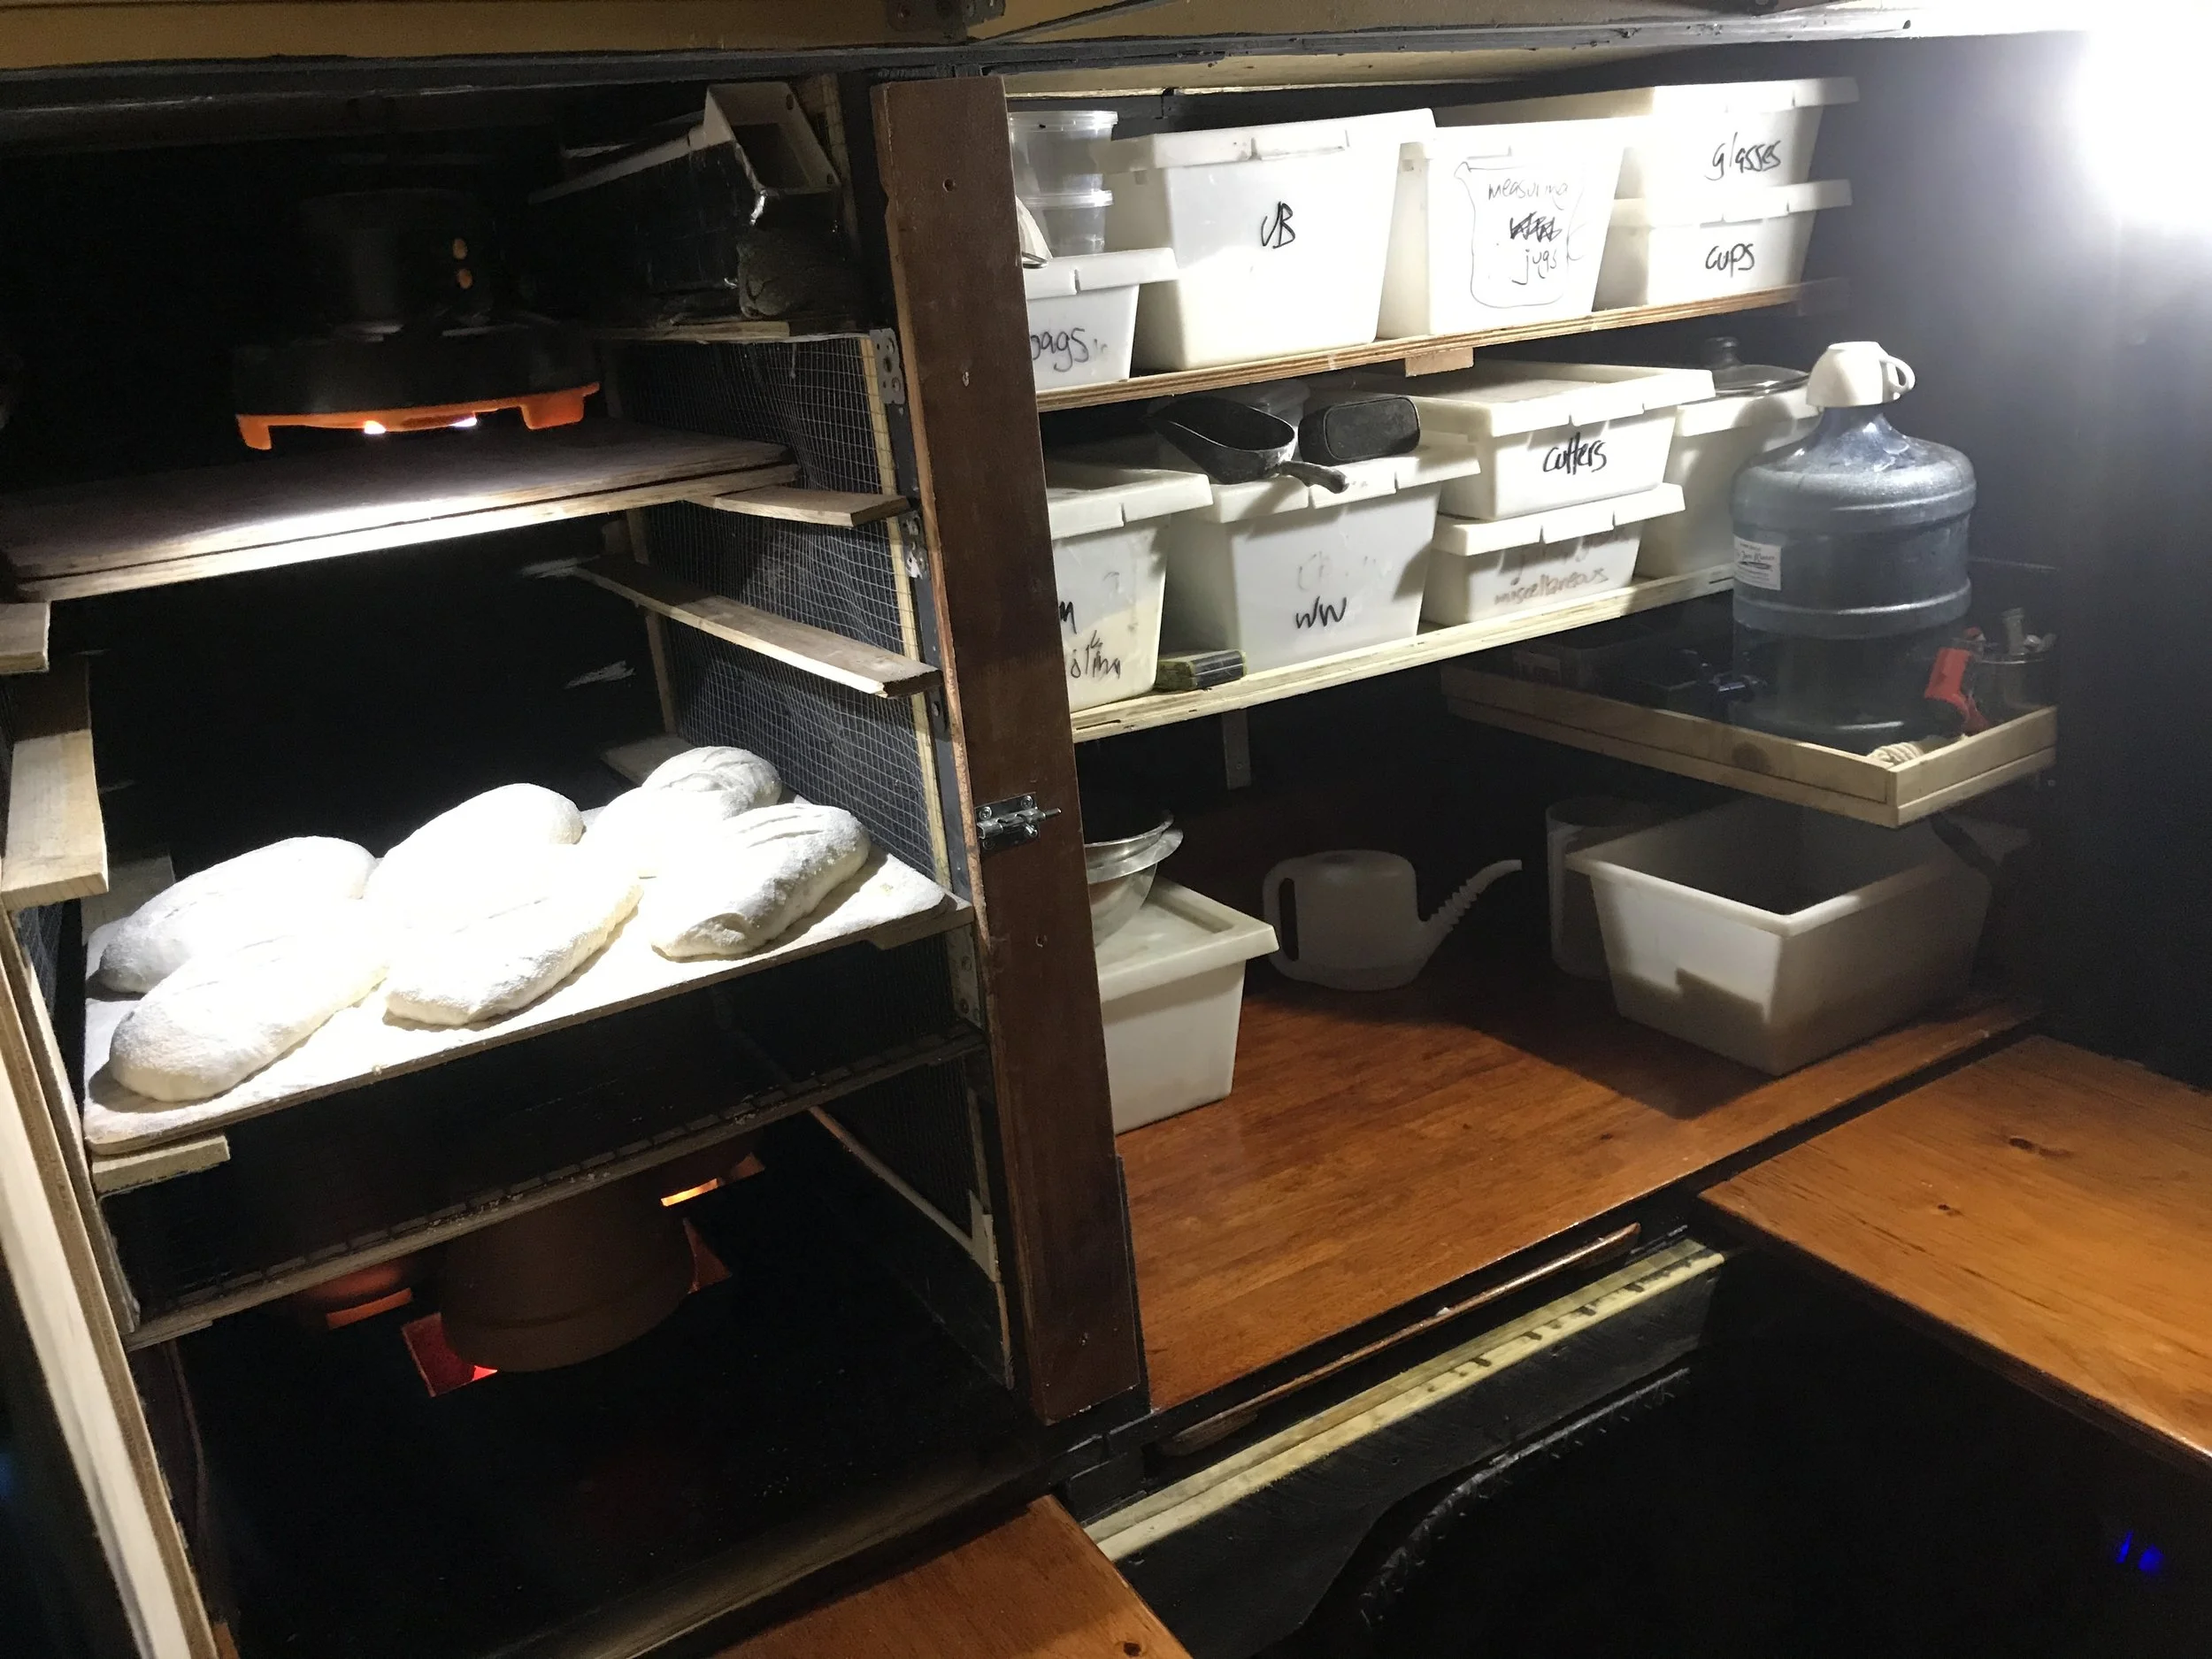
So here I was, camped on the farm in my caravan, waiting for things to happen with the dairy shed, which will become my classroom and bakery when it’s finished. I had all my bakery gear packed up. I didn’t have a bakery to put it in, but I did have the trailer, and a space in the shed where I could temporarily set up some of my equipment - the mixer, a fridge, a bench, and some ingredient storage shelves.
All I had to do, I figured, was to permanently install the traveling oven I took with me on the Tour Down South into the trailer, get the Coolgardie Cooler working better, and create a proofer on the trailer. Then I could bake at least a few dozen loaves at a time. This would be enough to make ‘a bit of dough’ while I was waiting for my new home to be built.
So I’m reinventing the reinvented, repurposed and recycled trailer. First it was a six by four, then it became my bakery shop and bread transporter, and then it became a mobile classroom and boudoir while I traveled the country, and now it was to become my semi mobile temporary bakery. I’m calling it the Bush Bakery II.1.
Getting the Cooler cooler
I figured that the issue with the Coolgardie Cooler was ventilation - it simply didn’t move air around inside enough for there to be any evaporative cooling effect. I decided to improve the ‘Coolgardie Coolroom’ by adding solar driven frictionless computer fans to the coolgardie screens, so that air would circulate quickly and constantly through them, and then inside the box. I installed a couple of vents to the outside of the trailer to assist with taking in air.
I had used a similar fan system in the Bush Bakery Mk I, which was adequate for holding dough cool for a day or so. Tried and tested technology, even less than perfect technology, is always a good option for me.
I purchased a 5V battery which could invert to 12 volts, and a solar panel which could be attached to the roof. I was aware that I was moving away from my ‘third world simple’ approach, which had guided me throughout the build of the Bush Bakery Mk II. Frankly, this approach had failed me with regard to the Coolgardie Cooler, so it was time to enlist some slightly more sophisticated solutions. Despite my extremely limited ability with regard to electrical wiring, the fans work very well. They will run for about 3 days without wearing out the battery. When the battery is plugged into the solar panel, running the fans rarely lowers the charge of the battery. It can be raining and cloudy for days on end and there will be no interruption to the ventilation inside the cooler.

Putting some vents into the Coolgardie Cooler
The screens in the side of the cooler were made from recycled exploded clay pellets wrapped in shade cloth, chicken mesh and hessian. I ran bleeder hoses through them so the clay could be moistened. There are hose outlets fitted so I can just plug in a regular garden hose to refill the screens with moisture. Once the screens are moistened, the fans can achieve about 5 degrees cooler than the outside ambient temperature. This isn’t enough to keep dough cool, but it shows there is an evaporative cooling effect. In future possible versions of this technology, I think I would make a lot more air move through the screens, as well as create a better plumbing system to hold water evenly through the vertical surface of the screen. For now, I have to add ice to the system to really make it work properly, particularly in summer. When there is ice in the cooler, as well as moisture in the screens, the Coolgardie Coolroom can bring the ambient temperature down by as much as 20 degrees below ambient. This is enough to keep dough cool for many hours at a time. I use repurposed plastic bottles filled with water and frozen as my ice supply. As long as there is a freezer to supply ice, I can run the cooler continuously.
Interestingly, making ice uses very little energy. If you have a domestic fridge and fill the freezer section with bottles of water, the thermal mass created as the bottles freeze actually reduces the amount of time the motor needs to run to keep it cool. I wonder if fridges harvest the cold from the freezer section to cool the fridge section - and if they don’t, why don’t they?
I gotta say, I reckon I’ve now got a ‘cool’ cooler. I’d given up on it during the Tour Down South, but with this new tweak it has become a useful piece of equipment. I can see myself modifying it a bit more down the track with the addition of more fans and more fins (timber fins to rest transit boards full of dough). Its capacity is currently just a trifle small, but I have plenty of space which I can use.

The Bush Oven installed on the trailer.
The Bush Oven becomes a weapon
Setting the oven up on the trailer in a permanent fashion was something I had been wanting to do since I was in WA on the Tour Down South. On the road, despite having all my tools on board at the time, it was just too difficult to do from a practical perspective. Now I was parked here in a paddock, it was easier. I designed the space for the oven to be postioned on the trailer to have an adjoining insulated box, similar in shape and size to the Coolgardie Cooler on the other side of the trailer. This would be warmed to become a proofer via a galvanised sheet of steel attached to the side of the oven.
The oven itself became wrapped in brick on five sides when I put it on the trailer. This was about a 400% improvement on the level of insulation I had when I set the oven up on its stand. This was the primary reason for putting it on the trailer. Theoretically, the oven would now become a very fast, well insulated baking weapon.
The first attempt at mounting the oven on the trailer was partially successful - it certainly baked a whole lot better than it did when I used it on the Tour Down South. The adjoining proofer was also a success. While it couldn’t create moisture within the box, it heated it very gently as the oven warmed up. I soon added a spirit burner stove with a saucepan of water to create steam. The proofer was very well insulated, and one load of water boiled at the start of a bake was enough to keep the proofer moist for a whole bake.
A Woodfired trailer?
My first serious bake using this setup was for a massive 90 loaves, which was during a 300 series workshop. While the oven held up to a continuous bake environment, a few hours after the bake was done I noticed a bit of smoke coming out of the trailer. The trailer actually had caught fire, and was well alight by the time I could get a hose to it!
Fortunately, I was able to put the fire out (thankfully I had a student, Jerome, hanging around after the workshop, who had a lot of patience and common sense - without him being around, I reckon I would have lost the trailer to that fire. Thanks Jerome!). It took a few hours of hose work to get to the seat of the fire, and to totally drench the trailer so it wouldn’t start again.

Adding a bit of fire blanket…
The next day I took the oven out of the trailer, and found that it had burned through the timber ‘floor’ below it. There was already 3 inches of brick under the oven, so I wasn’t expecting this brick to get so hot! I re installed the oven, this time with lots of fireproof insulation and more brick.
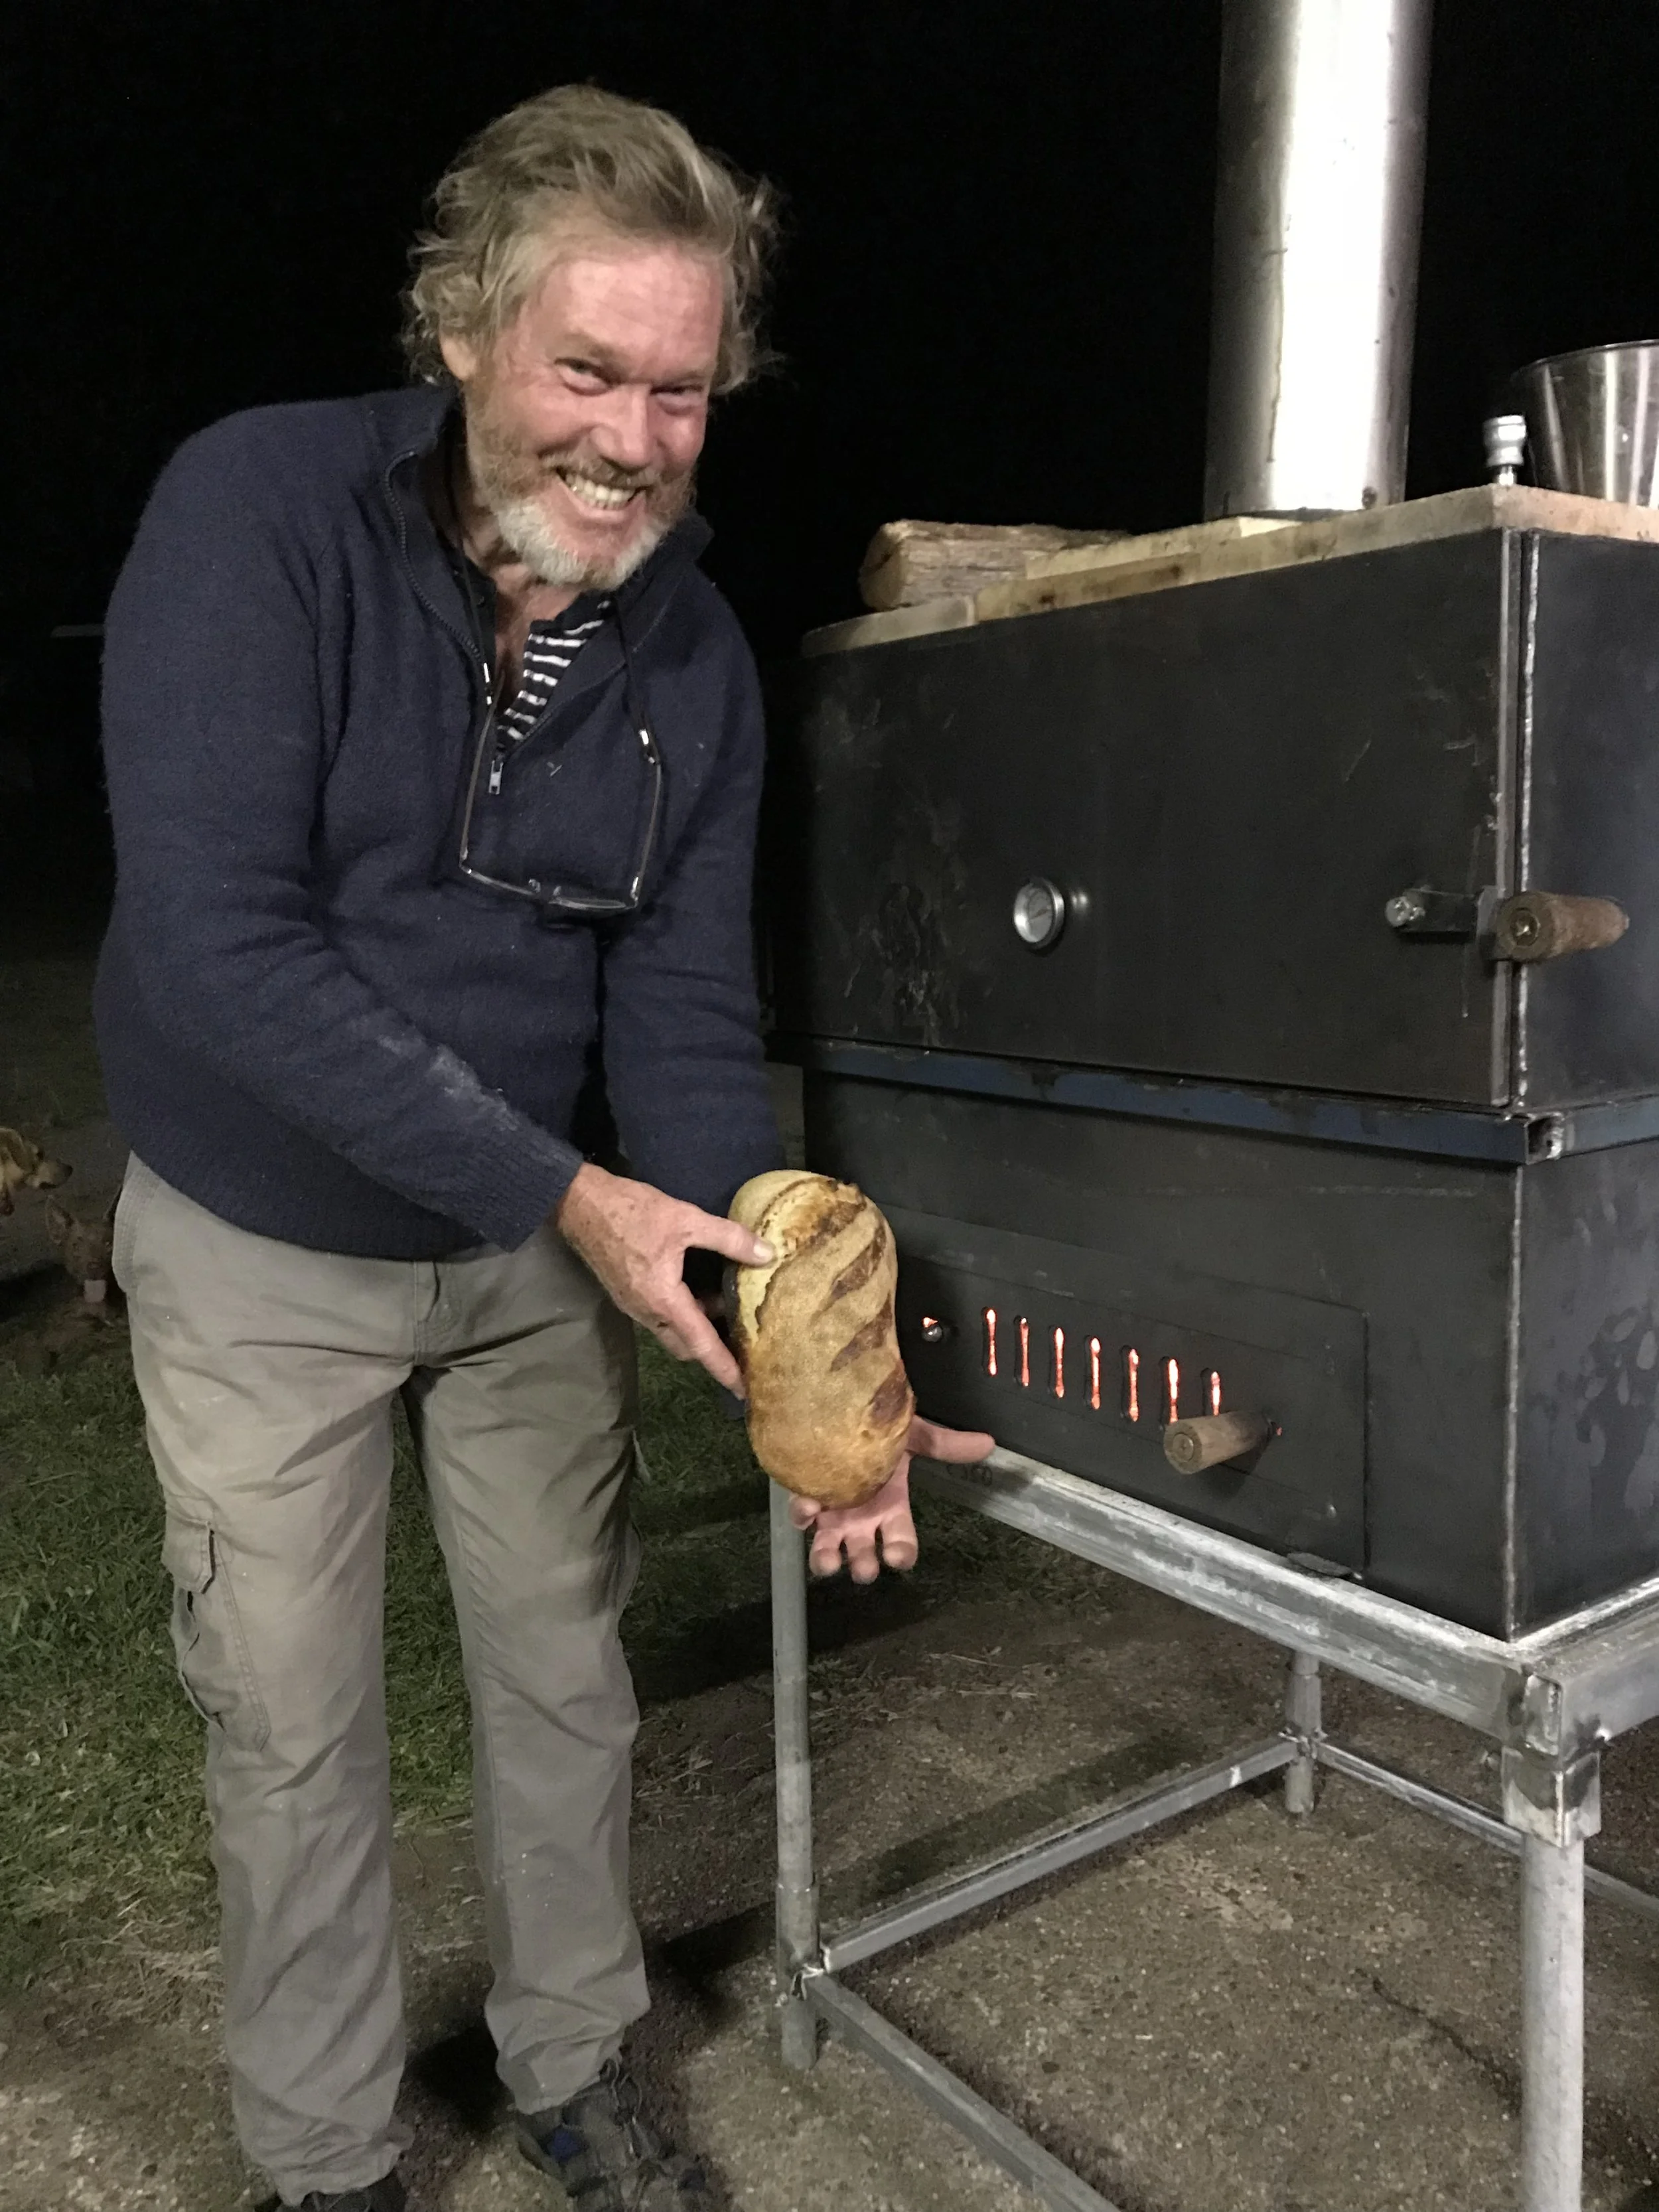
At the time of writing, I have re installed the oven a few more times, as I’ve built up my baking practice again. Each time I’ve refined the thermal setup. It’s now wrapped in lightweight concrete, brick and thermal blanket. And it is truly a baking weapon. It holds six loaves at a time, and can pretty much continuously bake an average of ten loaves per hour for as long as there is dough to bake. I rate this oven highly in my history of bakers’ ovens. I’ve probably baked in a dozen different types of oven over the years, and while this one doesn’t have the capacity of some others, it is great fun to use. The baker is working pretty constantly while using it, but for some reason it’s just very pleasant work. I’ve worked bigger ovens with much bigger throughput, and sometimes these ovens seem sluggish by comparison. This one is a little racing car! It requires constant attention, and can easily burn off the track, but if you keep an eye on things it goes very fast. It’s my pocket rocket.

The entire setup, the Bush Bakery Mk II.1, is also a baking weapon now. It’s very easy to control the bake, with a solar coolroom, a proofer powered by the oven, a dough area and ingredient storage all on board. I haven’t mentioned my new dough box, which is finally finished as well. It’s only used in classes, but it’s a great tool for making up to ten kilos of dough at a time. This piece of kit qualifies for another blog post! I truly now have an off grid bakery.
And now?
I’m currently in the process of doubling the output of the Bread Subscription Service. The subscription model is great because I can control growth. I take on new subscribers in a fairly planned way, in lockstep with the production capability of the bakery. The Bush Bakery Mk II.1 can comfortably bake 60 or so loaves in a session. This will be enough to keep things cashflow positive while my proper oven, Luna, gets refurbished.
My aim is to have a comfortable capacity of 100 loaves a day when the Steady State Bakery (see previous blog post) is properly functioning. This will be once again utilising my big girl, Luna. She’s currently having a rebuild by my erstwhile oven collaborator, Craig Miller of Aromatic Embers. Our expectation is that Luna will be a faster, steadier oven than she was. We’re adding a lot more thermal mass to her, as well as redoing the baffle system, the doors, and we are installing a bunch of cleaning access tubes to easily de soot her. I’m pretty excited about all this, and getting more excited as she nears completion.
As I write this entry, the dairy shed has internal walls built, some of the new ceiling done, a couple of doorways ready to have big glass doors put in, a new verandah roof over the back. The plumbing is half done, the wiring in place, and some of the insulation installed. There are soon to be two tradies working on the job, so it’s expected progress will hasten.
I do look forward to having my proper oven back, when the classroom and bakery in the dairy shed is finished. My life has felt like it’s on pause for the past six months, if I’m honest. The classroom section is getting done first, so should at least be ready in time for the next pro Sourdough 300 series workshops in May.
Subscribe, survive and thrive!
For now, I’m quite happy to bake a little bread each week for subscribers. The number of loaves baked and sold holds nice and steady. There is very little wastage. There will be growth, but in a very controlled way. Eventually 100 subscribers will be on board, as I believe the Steady State Bakery can handle these people’s total bread requirements fairly easily when it is finished. Currently I’m baking once a week, but I believe there could well be demand for another baking session or two in the schedule in the not too distant future.
Beyond this, I’m anticipating the dairy shed will be workable. Hopefully the growth of the subscription system will coincide with the work on the bakery and classroom here.
Watch this space for more about the new dairy shed, which will soon by my bakery and classroom, as it develops.
If you live in the Newcastle/lower Hunter region and would like to learn more about the subscription service I’ve now set up, here’s the link!
The birth of ANOTHER bakery - among other things.
The foothills of the Great Divide
Crossing the country and having this past year as a ‘sabbatical’ from baking commercially has led me to a number of realisations. The whole time, I’ve baked for myself and my students; I’ve had good bread to eat. Since I returned, though, something has been missing.

I’m addicted to my bread.
Addicted to bakeries?
Lets face it. I’m addicted to baking, and I’m especially addicted to my bread.
This extends into building actual bakeries so that I can make lots of the bread I really like to bake.
Like all addictions, it is multi leveled.
Firstly, I need to eat this bread. It’s like my medicine as well as food. As long as I have this bread to eat, the world, in my eyes, is okay. Even if I have very little money, I have nutrition - all I require is a piece of bread, maybe some cheese and tomato, and I am nourished. Other breads just don’t do it for me in the way mine does. Not to say there aren’t other great breads - it’s just that I’ve arrived at a very specific bread and I would like to keep having it for breakfast. And lunch, if possible. Occasionally dinner is okay as well.
Then, the addiction to the process of baking it kicks in. Baking provides a weekly rhythm, something to structure your day around. The process is its own reward - a good bake, and you are on top of the world. Of course, a bad one is somewhat less than ideal, and a number of bad ones in a row can be soul destroying. Luckily, there are more good bakes than bad ones.
Finally, the addiction to the financial reward can’t be ignored. When I bake each week, even just 30 loaves or so, there is cashflow. When you are a micro business, regular cashflow is everything. Before I moved from Ellalong, I was baking a few hundred loaves at a time, and this provided the bulk of my regular income. Now the weekly bake makes up a small but important part; teaching, consulting and training make up the rest.

Oh for a ‘Steady State’…and I don’t mean politics!
Some ideas pass naturally, while others persist - or more correctly they mutate in my mind.
I’ve been in the food business now for over 30 years - and for the past 29 I’ve been involved with bakeries and cafes. I’ve been wondering about energy use that whole time. I’ve experienced, lamented and deeply pondered food waste. Another issue to fill my grey matter has been wear and tear on bakery equipment.
After a while these three categories of problem morphed into a single simple solution. I want to establish what I call a ‘steady state bakery’. The idea is a bakery which produces the same basic amount every day. It doesn’t grade up production on one day to wind it down on others. It won’t be ‘market driven’ - like most bakeries are, as they surf the highs and lows of bakery production life.
I’ve written about this subject in earlier blog posts right here. Scroll backward and you’ll pick up multiple references.
All machines, and I’m including a bakery as a machine, are designed for optimal conditions of use. Then they are tweaked to extend the conditions to make them operate in real world conditions. When a machine is dynamic, it wears out more quickly.
A stable machine wears less, and consumes less energy. When a machine operates at the same pace all the time, stresses and strains are minimised on the componentry. They last longer and consume less energy.
Humans are different. They don’t mind work, but they need rest. And they need rhythm. Humans do well with a combination of routine and rest. Any human centered machine has to factor in humans.

My past two production setups have been specifically designed to supply weekend markets. This means that they bake large volumes on just one or two days a week. The rest of the time, they are either dormant, or being used for teaching, consulting or pre production work. So each week the machine gets wound up, stretched beyond capacity, and then wound down again.
A baker commits to the market each week, whether it is on or not. They work days in advance as they go about their routine, and by market day they are simply loading their freshly baked bread into their vans to meet their customers and to get paid for their work. If it rains and the market is cancelled; their payday just disappears. Then, the word wastage takes on a whole new meaning!
Every bakery has a lot of production variables; the seasons, new customers, wholesale business orders, local trading conditions, bakery competition, weekend markets and much more. Thus, all these variables inevitably lead to bread waste, and volatility.
A bakery, then, is usually a highly dynamic machine. Dynamic machines are prone to failure.
The ‘steady state’ bakery is different; it’s meant to produce the same amount of bread each bake - each day, week or month. It’s a machine with a daily rhythm based around repetition. It’s designed for a particular volume - nothing more. It doesn’t get ‘pushed’.
By doing this, there are many benefits. The machine doesn’t have to work hard - it just works the same amount each time to get the job done. Thus, the machine lasts longer and uses less energy. The more often it works, the less energy it requires in proportion to the output. The machine can be scaled up or down according to requirements, but in a planned way.
With a daily and weekly rhythm in a Steady State Bakery (SSB), there is a curious bi product; learning happens through repetition. The bake is a series of processes which are done at specific times, each with its own set of KPI. The only person who needs an overview is the baker. Through working with the processes, helpers gradually understand the overview; through learning all of the processes involved in a hands on way, humans involved piece together the whole picture, little by little. So a SSB is also a great environment for learning processes.
Another advantage of an SSB is being able to properly plan for the bakery’s resource use. Things like fuel, ingredient supply and freight all are best delivered in steady amounts, not only from the bakery’s perspective, but also from a logistics point of view.
Still another benefit is to be able to concentrate on reducing the environmental damage which a bakery can create. A SSB makes it easier to have a cause and effect solution put in place as there are no extremities to take into account.
Subscription baking - bread as a service
Every baker loves to set production levels to suit ourselves and our equipment. These levels should also enable us to make a crust. (:))
We have to find homes for all that bread we are baking - we definitely don’t want waste. As mentioned earlier, supplying markets leads to waste, one way or another.
To achieve steady production and sale of bread, with as close as possible to zero waste, I decided to set up a subscription system. Customers ‘subscribe’ to my baking and delivery service. By purchasing multiple loaves in advance, subscribers save money. They are bulk buying, with the convenience of having just a loaf or two delivered when they want it.
The bakery gets the benefit of steady customers and cash flow every week. And ‘planned by demand’ baking, so that only the amount ordered is supplied. The bakery works by the batch, the size of which is determined by the number of subscribers at any given time. There is always a degree of guesswork in determining the batch size each week, but the risk of wastage is reduced dramatically when compared to baking for a market which could be cancelled at the last minute.
My first attempt at subscription baking was about 8 years ago when the bakery was in Newcastle West. The model worked really well, but I moved into opening that bakery for retail business, and just outgrew the subscription model.
This time, the plan is to stick with subscriber based retail and incorporate it into the fabric of the School of Sourdough. A Steady State Bakery which is also a school, driven by subscribers.
In a bit of a departure from the original plan, I’ve included the possibility of resellers or ‘value adders’ being able to access the service. This means if you have a cafe or a shop or a food co-op, you can also subscribe. At the time of writing, we have two retail outlets on board, allowing the general public to buy bread on a whim. There is space in the system for more businesses to subscribe to the service, so those of you who want next level bread locally can get it without actually subscribing - all you need to do is to convince your local cafe or health food store to subscribe for you!
I’ll go into the new range of services in a separate blog post very soon. If you’re interested in becoming one of our Newcastle and Hunter Valley region subscribers, here’s the link!
Coming to grips with 'Erratic Bread Syndrome' at Yirri Grove

The Nullabor, twisted by me, in a camera.
The final workshop for the Esperance leg of the trip was held at Yirri Grove Olive plantation, out on the other side of good old Esperance.
I love the twist and turns of this journey; how they continue to surprise me. Plain sailing was never the objective of this trip. Nor was it expected, with an eighteen year old car and a recycled bakery shop being towed about fourteen thousand kilometers while crossing the seventh largest continent on earth. Not to mention a Kelpie canine and a Burmese feline who both ‘volunteered’ to ride with me. Esperance

We’re going WHERE?
(It was an open discussion between us. I did the talking and they did the listening.)
The Tour Down South was to dive in a deep pool of unknowns; and to have a go at something I hadn’t done before.
I often delude myself that I have been the inventor of lots of things in the bread world, or that I was the first one to do a particular thing. Pretty much every time I begin to think this, somebody from the other side of either the world or Australia lets me know that in fact this thing has been done centuries ago. Nonetheless, I’m still pretty sure I’m the first person to take a wood fired bakery across Australia and back on a six by four trailer. Please, prove me wrong!
One of my clients in Perth called my idea to do this trip ‘ballsy’. At the time, I wondered how he could see it that way. I mean, a coolroom powered by the breeze, and a wood fired oven, some flour, some firewood. No water. What could possibly go wrong? And if something did go wrong, well, I could turn to YouTube for help, like everyone else does. Or Instagram. Or Facebook.
We are never alone, even when we are in the middle of the Nullabor.
(Except, of course, there is no internet in the middle of the Nullabor. ‘Null’ means ‘none’. We are not talking a little ‘none’ here either. We are talking a big ‘none’. You have no idea how big ‘big’ is, but I’ll return to that idea later.)
Now I was on my way to Yirri Grove Olives, where Anne O’Neill ran a small plantation and pressing facility. They also have a cafe there, just past the wetlands of Esperance.
This is a place where there is a sign on the side of the road which keeps drivers updated daily as to the condition of the roads in the area. It’s not uncommon to lose a road or track due to various reasons - the tides, the changeable (and very windy) weather and so forth. The sign at the edge of it helps locals and visitors keep up to date on daily conditions.
I’m ushered into a large awning behind the cafe, plenty of space for the Bush Bakery MkII and my coterie of creatures. Being protected from the elements in this elemental place was a relief.
We are immediately accosted by a noisy crew of guinea fowl, who come charging down to the fence beside the awning to let us know they were on the job, and not to try anything stupid. Immediately, my kelpie Pippa is fascinated. She’s a cattle dog, and these are like cattle fowl. I think she was impressed. Or confused. Or both.

Here’s Anne, looking blurry. That’s because I’M blurry.
Anne and her husband are truly the most welcoming folk I think I have ever met. From the moment I arrived to the moment I left three days later, I was embraced like family. This experience of ‘welcoming the stranger’ has proved to be a profound one for me. Everywhere I stayed across the continent, I felt like a stranger; and yet, was welcomed almost universally. There were exceptions, which may well be expanded upon in some other blog at some other time. On this night, me and my family of furry friends were made welcome. We rested well.
The time gap between workshops was minimal. It took me back to ‘working’ as a musician back in the day. Pack it up, and set it up again somewhere else. Do it fast, and do it efficiently, so you can do it again. Breakfast hospitality was new, and welcome - so much so that before I knew it I had another dozen keen bread makers waiting on me to finish setting up!
At this workshop, I stumbled on another clue which would eventually lead me to solve the riddle of the ‘Erratic Bread Syndrome’ which had been plaguing me of late. For the past few workshops and bake offs, I had mixed results - which have been discussed in this blog on numerous occasions. Some breads I had baked along the way were okay, some were pretty good, and some were atrocious. I just couldn’t seem to get it consistently right. It would have been easier to solve the problem if the bread had been consistently bad - but the mixed results made it harder to work out where the issues were.
Thus far, I had observed that my list of variables was huge - variable flour, variable water, variable temperature and variable weather. Indeed, the entire trip had been one variable after another. So my breads were simply following suit. But how could I grab this thing by the tail and get control of it?
I was pursueing this process of ‘reducing variables’ when it occurred to me that the age of my starter between feeds was also a variable. I would sometimes go a couple of weeks between bakes, and as such I would simply keep the desem (dough starter) cool as best I could - but feeds were fairly irregular, and temperatures varied quite a lot as well. My ‘coolgardie’ style evaporative cooler was next to useless.

The first incarnation of the ‘Coolgardie Coolroom’.
(As you might not have been following this story, I’ll explain. I designed the Bush Bakery MkII to be as ‘off the grid’ as possible. I reasoned that a simple evaporative cooler, a la the ‘Coolgardie Safe’ crossed with a ‘zeer pot’ would work well enough to store dough and sourdough starter in the middle of Winter crossing the desert.)
I went through lots of evolutions in thinking about this idea of an ‘evaporative coolroom’, until I ended up with something that was capable of being both a cooler and a proofer. It had expanded clay balls from an aquaculture setup contained in screens along the walls, which were filled with water via a bleed hose. The water, theoretically, evaporated from the clay pellets via airflow, which came through the walls as the trailer moved through the air. It was like an automatic evaporator, which was supposed to reduce the temperature of the air.
When I wanted to 'proof’ (warm) the dough just prior to baking, I simply added a spirit burner (a ‘trangia’ alcohol burner) and a plate of water mounted on top, which warmed up the box and created steam. As far as this side of the equation was concerned, the proofer worked a treat. The cooler, on the other hand, could at the very best remove 5 degrees c from the air temp. I concluded that there wasn’t enough air flow to really circulate the air. My plumber’s skills were also lacking, as I couldn’t get the bleed hoses to work properly in the screens.
THe ‘Coolgardie Coolroom’ in proofer mode.
As I write this blog post some months later, and I can tell you that I’ve now made the cooler work via a small solar powered battery and some low friction computer fans mounted in the walls. These work pretty well, but when I was on the road the ‘coolgardie coolroom’ side of things was an impediment. I had resorted to purchasing ice on a regular basis to keep starter and food cool on the road. This meant that the starter could swing from under ripe to overripe quite quickly.
As I traveled, there was not always the facility (decent water, relatively enclosed space and good weather) to set up the mobile bakery and feed the starter.
The starter had been fed just before the last bake at Bread Local. It had been getting quite a bit of a workout, actually, with three bakes in just a few days. So that eliminated another variable.
In the workshop, we made dough as a group, using a few techniques which enable people to be able to make dough cleanly almost anywhere, including out in the bush where there might not even be any table! Our doughs worked really well, though were not ripe in time to bake in the wood fired oven.
Because I had been experiencing ‘Erratic Bread Syndrome’, I pre made some dough the day before the workshop so the students could bake it on the day. This was like a kind of insurance policy; the dough may go off too quickly, or not at all, so ‘here’s one I prepared earlier’ came to be my primary backup. I also shaped some dough ready to bake; I really didn’t expect it to last in the faulty cooler. When I checked it in the morning, it had skinned, and, miraculously, somehow it seemed to be in good condition, beyond the skin that it had formed. The ‘skin’ is normally a negative, but in this case it was holding the batards together in the cooler.
As I mentioned earlier, there were lots of layers of preparation for this class - I was determined to remove baking risk. We baked various stages of dough that day, fresh dough, overnight proofed dough, and pre formed dough - unsurprisingly, with mixed results. Some were okay, but there were also some flat ones.
The mystery deepened. It didn’t seem to matter how much preparation I did - how many ‘insurance policies’ I made to ensure I had some decent bread for my students. I still was having failures, and that meant I was still struggling to figure out which of my variables was causing the problem.
I had removed another variable as well - I had returned to using Wholegrain Milling flour, thanks to Tiff using it at her bakery. I knew wholegrain milling’s flour, so I bought a bag from Tiff’s supply (thanks Tiff!) before I left. Prior to this I used whatever I could get at the local supermarket. I was confident I could work with many different types of flour, but this was proving to add a variable.
So two variables eliminated now.
Water, temperature and weather remained variables to be dealt with. I may never get on top of the last one; but if I do, there’s an excellent subject for another blog post!
It seemed like I had still had numerous problems, all at the same time. It never rains, as they say. Until it pours.

The Bush Oven, insulated by the use of some firebricks and terracotta pots placed on top.
I was becoming more aware of the limitations of my Bush Oven. It had very little insulation, and so was dependent on constant fire to achieve good results. In a workshop situation, this is a hard ask, as it can become a full time job just keeping the fire at the right pitch. I can rarely do both things - keep a fire running well and teach a group of people - simultaneously. Often, a compromise involving intense fire activity interspersed with none whatsoever, was reached. Not what the scientist in me would call ‘consistent’. So add this to the ever growing list of variables in my current baking practice. Occasionally I would delegate a member of the group to this task of ‘keeping the flame that never will die’, but the finesse involved ends up becoming too much for the student. They too struggle to attend the class and run the fire at the same time. This technique was also flawed, but it did help when I had a good firekeeper.

Just another variable to absorb in the problem solving process - firewood!
To add to this, different locations offered up different timbers. This place had a legendary fuel, mallee root, which many people rave about. I used to have access to it in the Blue Mountains from time to time - we had a firewood fetcher fella who would bring it down every year for us, and with my slow combustion fuel stove (which warmed the house at Medlow Bath back in the day), Mallee root burned as hot as coal, and as long lasting. I thought it was amazing, and got it whenever our wood fetcher had it. This time around, though, my little baker’s oven didn’t like it at all, as it generated lots of hot coal. The Bush Oven (in fact all of the ovens I’ve designed), prefers flame. The flame pushes the flue gas more efficiently all the way around the baking chamber. Hot coals, on the other hand, tend to make the bottom deck too hot, and the top deck gets too cold.
Some timbers are better at delivering flame than others, and these were not always plentiful. As they say; ‘You pays your money and you takes your chances’. So yes, firewood quality was another variable I had to deal with.
Reduce two variables, Starter and Flour; and discover another two, the Oven and Firewood. Two steps forward, and two steps back. Could it be that I have discovered the ‘Bakery Two step’ ?
After the workshop, I decided to process some of the leftover dough we had made that day - I had a hot oven; why waste the heat? I asked Anne and her husband to swing by later for an extended bake off. The oven had been running for many hours by now. I processed the dough through the second proof, and shaped some dough the students had left as well. By the time Anne and her husband came with wine and cheese and, of course, olives, all the dough had been shaped and was proofing nicely. I baked off some mini baguettes and some batards. All were sensational. The shape held, and the crust and crumb were both very acceptable. It had been the best bake I had done since before Perth. So what was I doing right?

Mini Baguettes and some batards.
We already established I had fresher starter. So one variable didn’t play into the results of the day. Secondly, I was now using consistent flour, rather than whatever I could get at the supermarket along the way. Another variable under control. Third thing: the water had changed. Some of it had been filtered and treated with light, which was how it worked here at Anne’s orchard, and this tasted pretty clear. The water I had used throughout the west had tasted like clay, almost without exception. Some of the dough made at this workshop was made using ‘clear’ water; but some of it had been made a day earlier, which hadn’t been filtered in the same way.
Thus, the quality of water wasn’t necessarily part of the solution here. Nonethless, if I was going to solve problems, understanding all the variables was essential - it was a large list, and getting larger and more complex as I went along. Changes in water quality were still a potential contributor. So I filled all my tanks with this clear water. I had about 60 litres all up, so this would have to last me until the next time I could load up with good water. I had a trip across the Nullabor, and my next workshop a full two weeks away, near Mildura back in Victoria. So I was most likely to use most of this water before I would make dough again. At least this time, I would have nice water on board to cross the desert!
(Last Nullabor crossing, the water I drank was ‘whatever was available’, - hadn’t allowed for enough storage capacity on the trailer - local water was often undrinkable. I had since added more water storage.)
I still managed to reserve about 10 litres of clean water for dough in Victoria, so that keeps that variable at bay for a little while!
So at Yirri Grove workshop it was back to Great bread. Since I’ve crossed the border into WA, it’s been Crap bread, Great bread, Crap bread, Mediocre bread, Great bread. The Erratic Bread Syndrome continues.
With two variables removed, another mitigated against, and quite a few more identified, I was actually feeling like I was making forward progress. Onward across the Nullabor one more time. I had the mental strength necessary to do it this time. I was getting used to life on the road. It was making me stronger.
The reinvention of the Bush Bakery

The workshop
Nothing excites me more than a new project. I've been holed up here about 15 minutes out of Dungog, at my mate Craig Miller's Mum's farm; I've set up my work space in the old dairy shed. My base resource is what used to be my markets shop trailer.
Your Challenge, should you choose to accept it...
For this project, I've set myself some really tricky challenges - not the least of which is to build the Bush Bakery Mk II almost entirely from existing materials - a kind of re purposing/recycling process. Essentially, I'm stripping out the inside of what was the shop trailer, and then turning it into a mobile baking classroom-cum-sleeping quarters for the Tour Down South.
I gotta say, I'm learning so much about recycling building materials, and how to work in this manner. It's about the third or fourth carpentry project I've done this way, and I feel as though I'm finally getting the hang of it. I've been working on it day and night for the past week in order to test it out before hitting the road properly in June. So far, I have spent a grand total of $100 on the refit; everything that came out of the old shop trailer has been broken down and reused in the new classroom trailer. My carefully laid out pile of timber, hardware, assorted building materials and baking equipment which came from both this trailer and my old classroom at Ellalong has been utilised well. Indeed, towards the deadline (Friday for Saturday's workshop) I was actually starting to run out of materials. Luckily, I managed to improvise well enough to get the new trailer ready for a trial run.
I took the newly repurposed Bush Bakery Mk II out yesterday for the first time to conduct an outdoor 101 class yesterday. I have been in a state of high anxienty all week, as I've been working on the trailer. There is nothing worse than equipment failure in the middle of a workshop, and so many things can go wrong when you are making bread from scratch with very little actual bakery equipment. Thankfully, everything worked quite well, and my students seemed pretty happy with the bread we baked, as well as the day in general. This feedback nourishes me and allows me to keep going on the project, knowing I'm on the right track.

One of the highlights of the day was just how good the oven I'm using works. This oven was made in 1924 in Massachusetts, USA. It weighs virtually nothing - maybe 5kg - and it can bake a few loaves at once. It was the inspiration for the Bush Oven which Craig and I are currently designing for the Tour, and yesterday was the first time I have actually used this beautiful antique oven. Wow! What a clever little thing it is. I've been reflecting once again on how we think we are currently really technologically savvy, and yet back in 1924 they made a super efficient oven which can do a lot of baking from not much at all. We fired the oven up with lightweight firewood, and managed to bake a baker's dozen worth of loaves in a just a few hours. The oven spring we were getting was nothing short of amazing. Crust colour wasn't great, but the crust itself was brilliant. Leathery, crisp and thin. Colour can be addressed in other ways - but black ovens like this one are notoriously difficult to put steam into. Nonetheless, Craig and I are now working with this idea for our new Bush Oven. Stay tuned for progress here.

The trailer currently is barely functional. I got the basics done for the workbench, but I had to improvise a way to hold wooden transit boards for final proofing which was barely adequate. The idea I am working towards is a kind of third world retarder/proofer, based around the same technology utilised in the Coolgardie Safes of last century - essentially coolers which worked by evaporating water. My version will have walls made of expanded clay pellets, which were used in an aquaculture setup here on the farm, and which will be wrapped in wire mesh. These pellets hold a lot of water, and the way I'm going to build it will allow air to pass around the pellets, causing evaporation as well as turbulation. Airflow will be provided by vents which are on the front of the trailer, so when I'm moving the Coolgardie will cool things down. When I'm stationary, the cooler can convert to a proofer by wrapping it up in calico and placing a water bath warmed by hot coals from the oven. If I build it right, it will seal well, and in theory will satisfy my hard core off grid requirements.
Plumbing for the Bush Bakery will be very simple. There will be hot and cold water, as you would expect; I've salvaged a stainless steel water tank from the Bush Bakery Mk I, and this will sit on the roof and be heated by the sun. I've used this incredibly basic technology before, and it heats water well, even on cool days. The tank will connect with a tap inside the trailer, and will also provide the water for the Coolgardie unit via a trickle feed system. This will have a valve fitted to regulate the water flow so that the cooler will have the right amount of water for evaporation. Cold water will simply come from a hose connection. Weight is an issue with this small trailer, so I won't be carrying much water when on the road.
I've written about the mixing tools here already - I'll be making a Baker's trough for this purpose. More about this when I've made it. Again, I'll be playing around with my version with a view to optimise it for weight, volume and mechanical advantage. By the time it's ready, I'll have most of the rest of the trailer's infrastructure complete, so there will be some trials to do before I roll on down the road with the Bush Bakery Mk II.
For the sleeping quarters, I'm going to have a simple fold out bed on the opposite side of the trailer to the kitchen. I've insulated the roof, and will be insulating the wings which fold out to provide shelter. I'm still deciding how to create walls and windows for my fold out bed - I'm tossing up between some sort of canvas/shade cloth roll down wall system, or something a bit more sophisticated made of wood. It will be the middle of winter, so it is going to have to be able to keep me and my dog Pippa warm and dry every night. Pippa's bedroom will be on the ground under the fold down bed. I'll be adding a mesh section under it to keep her contained while the moon is out.
I've got six weeks to finish and test my Bush Bakery Mk II. As usual, I am confident I will have it all good to go by then - but anyone who saw me a few nights ago before Saturday's workshop would know, sometimes I tend to be a bit more ambitious with my projects and the deadlines I set for them than is humanly possible. That's just the way it is. I can only plug away, and hope that I get a good run with things. Sometimes jobs like this can go smoothly and without too many hitches. Other times, stuff just eats up time, and progress is slow. This is a real risk with a project of this type - particularly when one is working with 'inventions' which one hasn't ever done before. There are many unknowns. In addition, my choice of re using and recycling as much as possible means I have to make do largely with what I've got. This is not simply an idealogical position - here at Wallarobba, it's a forty five minute drive to the nearest large hardware store, so you really can't just nip down and grab things on the spur of the moment. Buying hardware in this case involves planning, lists, and a flexible brain. Luckily, when we dismantled the Bush Bakery Mk I, materials were sorted and carefully dismantled because I knew they would be used again. Thus, my supplies are already waiting for me to use them - though I have no idea what things I will actually need as yet!
I do love a challenge. Keep an eye out for future posts right here to see how it's all going. If you would like to book for a Bush Baking Workshop, and see and use the new setup, you can book for any of the workshops here. Keep an eye out for new venues via our facebook page as well. I'm coming your way soon!
